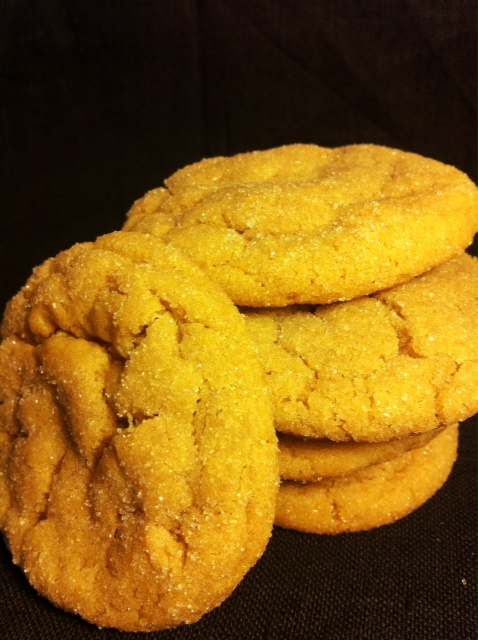
COOKIE WEEK!!! – Soft Snicker Doodles

As Cookie week comes to a close, my pants seem to be fitting a little tighter :).  It was so fun to have an excuse to have fresh-baked cookies almost every day.  Today, I wanted to share a really great recipe for snicker doodles.  First of all, I want to hug whoever thought up the name of this cookie, it’s just so fun.  This recipe came from AllRecipes.com, submitted by LKUEHL.  I made it for the first time about 6 months ago and was instantly smitten.  I threw away the other snicker doodle recipe that I had used for so long because this one was simply PERFECT!  A little crunchy on the edges and so soft on the inside.  My boys really love helping me make snicker doodles because they get the job of rolling the dough balls in cinnamon.  It makes them feel so important.  While I find it so hard to let go of my OCD when the cinnamon isn’t on there evenly or the dough “ball” is now a dough “blob,” I just have to smile and let it go because it is so fun and rewarding to them.

Ingredients:

1 cup shortening

1 and 1/2 cups white sugar

2 eggs

2 and 3/4 cups all-purpose flour

1 tsp baking soda

2 tsp cream of tartar

1/2 tsp salt

1/4 cup sugar

3 tsp cinnamon

Directions:

Preheat oven to 375 degrees F.

In a medium bowl, cream together the shortening and 1 and 1/2 cups sugar.  Blend in the eggs one at a time until well mixed.

Sift together the flour, baking soda, cream of tartar and salt. Stir into the creamed mixture until well blended.

In a small bowl, stir together the 1/4 cup sugar and 3 tsp cinnamon.  Roll dough into walnut sized balls (or use your medium-sized cookie scoop).  Roll balls in the cinnamon-sugar mixture.  Place them on an ungreased cookie sheet, two inches apart.

Bake for 8-10 minutes .  When cookies get that “cracked” look, they are ready to come out of the oven (see picture).  As with most cookie recipes, you always want to pull them from the oven before they seem to be fully cooked or browned.  This will keep your cookies nice and soft.

Cool on wire racks then seal in an airtight container to keep soft.
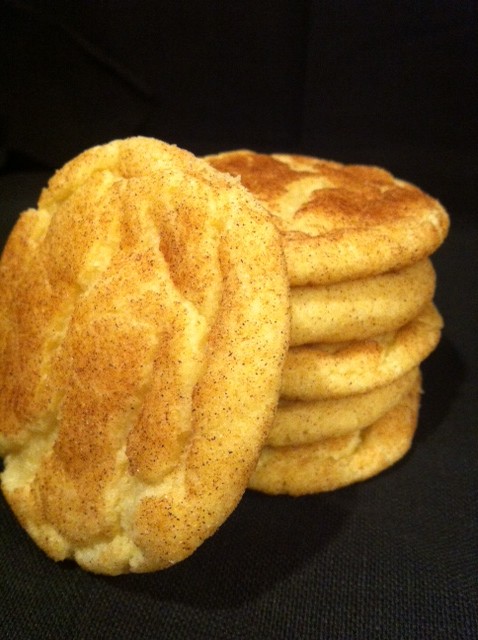
COOKIE WEEK!!! (part 2) Decadent Nutella No-Bakes

Wow what a week it has been!  When I decided to do a “Cookie Week,” this last week, I was completely underestimating what the second half of my week was going to have in store for me. On Thursday, I had what was supposed to be a “minor” surgery on my arm.  I thought it would leave me a little sore but completely able to function.  I knew my grandfather’s funeral service was Saturday, so my plan was to bake enough batches of cookies on Thursday and Friday for the remainder of the week, blog them, and take the cookies to the service… Wow, I was completely wrong!  Not only was I in excruciating pain, I got really sick from the pain killers.  So, needless to say, I was unable to finish out my cookie week this last week.

We had the most amazingly beautiful service for my Grandpa on Saturday.  While we cried so many tears, we also got to laugh a lot remembering what a funny, amazing man he was.  He had a full military (Air Force) grave-site service.  If any of you have ever experienced one, you know how incredible they are and how the folding and presenting of the flag with “Taps” playing in the background on the trumpet makes you gush tears.  I am so very thankful for my wonderful family.  I love that we are all so close and don’t just get together for funerals and weddings but several times every year and I am especially thankful that God blessed me with such a precious Grandfather.

I am feeling SO much better now (physically and emotionally), so it is back in the kitchen to give my wonderful followers the rest of their cookie recipes!  Sorry if any of you sat by your computers for three days, waiting for the remainder cookie week  ;).

Okay, on to cookies… I have been so excited to post this recipe because these are BY FAR the most incredible no-bake cookies I have ever had.  They are so rich, creamy and full of chocolatey goodness… not to mention, made with one of my very favorite ingredients on the planet… NUTELLA!

Ingredients:

1/2 cup butter or margarine

1/2 cup milk

1 and 3/4 cups granulated sugar

1/2 cup cocoa powder

1 tsp vanilla

1/2 cup Nutella

3 cups rolled oats

1 cup quick oats

Directions:

In a saucepan over medium-high heat, combine sugar and cocoa.  Add milk  and stir until combined.  Add butter and bring to a boil, stirring constantly.  Reduce heat and continue to boil for three minutes, still stirring.

Remove from heat and add Vanilla and Nutella.

Add oats and mix well.

Let stand for a minute or two, allowing the oats to absorb some of the moisture.  When the mix starts to firm up, drop spoonfuls (or use your cookie scoop) onto waxed paper and allow cookies to cool and set.

COOKIE WEEK!!! – Legendary Oatmeal Raisin Cookies

Good oatmeal raisin cookie recipes are definitely hard to come by. I have tried several recipes with mediocre results but the day I made this recipe was the forever end to my search for the perfect recipe.  There is just something beyond compare when you get that perfect mixture of tender raisins, oatmeal, cinnamon and soft chewiness.  To be honest, I have eaten more cookies in the past 4 days than I care to admit.  I might actually  be slipping into a partial sugar coma.  I seriously thought that I would be able to hold strong tonight and not eat any of these babies… WRONG! They are irresistible and worse than that, you literally can not eat just one.  I guarantee that once you try this recipe, you will be committed to it for life. I honestly believe the secret to these amazing cookies is in the soaking of the raisins in the egg and vanilla.  Try them and tell me what you think.

Ingredients:

3 eggs, well beaten

1 packed cup raisins

1 tsp vanilla

1 cup butter flavored shortening (feel free to use butter or margarine, this is just what I have always used and it is *perfect*

1 cup brown sugar

1 cup white sugar

2 and 1/2 cups flour

1 tsp salt

1 tsp cinnamon

2 tsp baking soda

2 cups oatmeal

Directions:

Combine eggs, raisins, and vanilla.  Cover with plastic wrap and let stand for one hour.


Cream together the shortening and sugars.

In a separate bowl, combine flour, salt, cinnamon and baking soda, mix well.  Add to butter mixture.  The dough will be very dry and crumbly at this point.

Add your egg/raisin mixture and mix until evenly incorporated.  Add oatmeal.  Dough will be very stiff.

Drop by heaping teaspoonfuls (or use your cookie scoop) onto an ungreased cookie sheet.

Bake at 350 for 8-11 minutes.  Mine were perfect at 9 minutes. Watch for slight browning around the very edges.  As soon as you see that, get them out of the oven.  They will seem undercooked in the center but it is essential that you get them out at this point so you can enjoy that super moist cookie instead of a crunchy one. They will continue to cook and set once they are out of the oven.  Wait 2-3 minutes before removing them from the cookie sheet.  Cool on cooling rack.  Be sure to taste your first one warm out of the oven… mmm…. so yummy!

*If you have never tested your oven temp, I would highly recommend it, especially if you ever have problems baking.  It is really common for your oven to be off up to 50 degrees.  My oven takes a full 20 minutes longer to heat up to the actual desired temperature AFTER it beeps saying it is preheated.  Also move the oven thermometer around to different spots in your oven to see if you have any hot spots.


COOKIE WEEK!!! – Fudge-Oatmeal Bars

These have been a favorite of mine since I was young.  I remember eating them at a little restaurant in my home town called Nibbley’s.  I came across the recipe in my Better Homes and Gardens cookbook about 15 years ago and have been making them on a regular basis ever since.  They are always a HUGE hit at parties, catering events, etc.  I made them for a Christmas Bazaar this last year along with tons of other stuff and they were my top seller.  People did the whole eyeball roll-moan thing when they tried them.  They are that good. Super soft cookie with a creamy, delicate fudgy center… by far the hardest dessert I make to be disciplined about not eating the whole pan (and it’s a big batch).  After I made them today, I only ate two, gave one to each of my kids, saved 2 for my hubby and wrapped them in about 10 pieces of plastic wrap on a platter so I would really have to make a pretty conscious effort to get in to them.  I am making my husband take them to work tomorrow because they are way too dangerous for me.   I promise you will love them!

Ingredients:

1 cup butter or margarine

2 cups packed brown sugar

2 eggs

2 tsp vanilla

2 and 1/2 cups all-purpose flour

1 tsp baking soda

3 cups quick-cooking oats

1 14-oz can sweetened condensed milk

1 12-oz package semi-sweet chocolate chips

1 cup chopped walnuts (optional, I don’t use them)

2 tsp vanilla (yes that’s 4 tsp vanilla total, two in the batter, two in the chocolate)

Directions:

BEFORE YOU DO ANYTHING… set aside 2 Tbsp of your butter for the fudgy filling (I forget almost every time).

In a large mixing bowl beat the remaining butter or margarine with an electric mixer on medium speed for 30 seconds. Add brown sugar; beat until well mixed.  Beat in eggs and 2 tsp vanilla.  In another large bowl, stir together flour and baking soda; stir in oats.  Gradually stir dry mixture into beaten mixture.  Set aside.

In a medium, microwave-safe bowl, combine your chocolate chips, 2 Tbsp butter, and sweetened condensed milk. Microwave on high for 1 minute, stir (above pic is what 1 minute in the microwave looked like for mine).  Microwave for another 20-30 seconds or until smooth and melted.  Add Vanilla.  Stir.

Press two-thirds of oat mixture (about 3 and 1/3 cups) to the bottom of an ungreased 15 x 10 x 1 inch baking pan (bar pan – if you happen to own one of the Pampered Chef Stoneware bar pans, they work fabulous).  Spread chocolate mixture over oat mixture.  Using fingers, dot remaining oat mixture over the chocolate.

Bake at 350 degrees F for 20-25 minutes or until top is lightly browned (chocolate mixture will still look moist).  Cool on a wire rack.  Cut into bars.  Binge Enjoy 🙂

COOKIE WEEK!!! – Homemade Chewy Granola Bars

So, I guess granola bars aren’t technically cookies, but these are every bit as good as a big ol’ cookie and every bit as dangerous to my sweet tooth. These, however, are quite a bit healthier.  I can actually feel good about feeding these to my kids.  They do contain some sugar and a little butter, but if you are giving your kids store-bought granola bars, these are 10x healthier than those and 100x tastier.  With flax-seed, oatmeal, wheat germ, nuts, peanut butter and raisins (or dried fruit of your choice), they really do have some good nutritional value with none of those nasty preservatives you get out of the box. The hardest part of these easy granola bars is waiting for them to cool before you cut in to them… I ate a whole row last night before they even had a chance to set up and cool.  I dare you to try not to take a big ol’ little taste test before they go into the oven (tastes like cookie dough without the egg… yeah).  I’m telling you folks, Cookie Week is going to be deadly for me.  I love cookies that much! Okay, I need to get to the recipe before I find myself standing over the granola bar pan (again) 🙂

Ingredients:

1/2 cup packed brown sugar

1/3 cup peanut butter

1/4 cup honey

1/4 cup butter

1 tsp vanilla extract

1 and 1/2 cups quick-cooking oats

1/4 cup sunflower seeds

1/4 cup raisins (or favorite dried fruit of your choice)

3 Tbsp toasted wheat germ (Just put it in a pan dry over medium-high heat and cook for a few minutes until toasty brown)

2 Tbsp ground flax-seed

1/2 cup sliced almonds

1/2 cup mini M&M’s or mini chocolate chips

This recipe is really versatile so feel free to subtract any of the nuts, fruits, chocolate, etc  and add your favorites. I really want to try to find some freeze-dried raspberries or strawberries and mix with dark chocolate and nuts.  I don’t care much for the dehydrated sweetened fruit so I would highly recommend the freeze-dried/unsweetened otherwise, your bars may get too sweet. 

Directions:

In a small bowl, combine the brown sugar, peanut butter, corn syrup, butter and vanilla.  Stir in the oats, sunflower seeds, raisins, wheat germ, flax-seed, and almonds.   Fold in M&M’s.

Press into an 8-inch square baking dish coated with non-stick spray.  Bake at 350 degrees F for 15-20 minutes or until bars are set and edges are slightly browned.  Cool completely on a wire rack (yeah right). Cut into bars.

COOKIE WEEK!!! – Soft Peanut Butter Cookies

I am so excited for this week!  I will be posting a delicious cookie recipe EVERY DAY!  I am a huge cookie fanatic so I think I will have to eat lettuce all week to account for the number of calories I am going to ingest in the next 7 days. I am going to make my husband take all of the cookies we don’t eat the day they are baked to work the following day because I can not resist them.  Just don’t look too closely in my cupboards or you might find a secret stash :).

Our first recipe is the “Mac Daddy” of all peanut butter cookie recipes.  I discovered it several years ago from allrecipes.com, (a recipe from Cindy Duvall).  These pb cookies are so soft with a little bit of crunchy just around the edges. My family of four literally ate the whole first dozen before the second dozen even came out of the oven (I won’t tell you how many of those went in my mouth). Ok, let’s get to baking.

Ingredients:

1 cup margarine, softened

1 cup peanut butter

1 cup white sugar

1 cup packed brown sugar

2 large eggs (always make sure you use large eggs when baking.  If you happen to get extra-large or jumbo, your cookies will turn out flat.)

1 tsp vanilla extract

3 and 1/2 cups flour

1 and 1/2 tsp baking soda

1/2 tsp salt

1/2 cup white sugar (for rolling cookie dough balls in)

Directions:

Beat margarine for a few seconds to get it creamy before adding peanut butter.  Mix in peanut butter, vanilla and sugars.  Add eggs one at a time, beating well between each.

In a separate bowl, combine flour, baking soda and salt.  Add slowly to peanut butter mixture until combined.  Chill dough for 15 minutes in the refrigerator.  Roll into balls (I use my cookie scoop for this then give them a little roll by hand to smooth them out.)

Roll in sugar then place on cookie sheet.

Bake at 350 degrees for 7-10 minutes until edges BARELY start browning.  Your cookies will seem undercooked but just like most other cookie recipes, this will ensure that your cookies are nice and soft.  Let cookies stand for 2-3 minutes before placing on a cooling rack.  Place in an airtight container once cooled completely to keep those babies nice and soft.


Macaroni and Meatballs

Many of you already know about the passing of my great grandmother (my paternal grandma’s mother) two weeks ago.  Last night, my dear (paternal) grandpa passed away too.  So much lost in so little time, especially for my sweet grandma.

If I could only describe him well enough for you to catch a glimpse of who he was: He was humble, unselfish, virtuous, righteous, loving, warm, happy, hard-working, and sincere.  There is not a single person in my family that did not look up to him as an example of how we want to live our lives.  He and my grandma had the most beautiful marriage of 59 years.  They truly put each other first every single day of their lives. My grandpa’s advice to me on my wedding day 11 years ago was to “never end your day without settling an argument (never go to bed angry) and pray aloud together every night before you go to bed.

Today I am featuring my grandpa’s very favorite recipe of my grandma’s for the past 59 years. My grandma made breakfast, lunch, and dinner every day for my grandpa and is a huge inspiration to me in my love for cooking. This recipe is country comfort food at its absolute best.

Ingredients:

2 cups macaroni noodles (1 heaping cup dry)

1 lb ground beef

1/2 cup onion, chopped (or 1 Tbsp dried onion) – I usually use fresh onion but I used onion powder this time since somehow I left it off of my grocery list. I added 1 tsp to the ground beef and 1 tsp to the gravy.

1/4 lb shredded cheddar cheese (or 2 cups)

1/2 cup flour

1/2 tsp pepper

1/2 tsp salt

1/2 cube butter or margarine

2 Tbsp ketchup

2 and 1/2 cups milk

Directions:

Shape ground beef into small 1″ balls then brown in a slightly oiled skillet with onion, salt and pepper.  Remove from pan and put in a casserole dish.

Start cooking macaroni.

To make sauce, melt butter with meat drippings, then stir in flour, making a roux. Mix ketchup and milk together then add to roux stirring constantly.  Bring to a boil and add cheese, stirring until melted.  Taste and add additional salt and pepper as needed. Drain macaroni and put in casserole dish with meatballs, pour on sauce and mix gently.  Bake for 20 minutes at 350 degrees.

John Campbell 05/19/1935 – 03/08/2012

I will miss you to my very core, every day Grandpa. I love you.

Braised Beef Tips

Today, I turned 32.  I used to think that was so old when I was young, but it’s amazing how young you still feel even when the wrinkles from your smile seem to be becoming permanent and the hairs on your head get a weekly inspection (and plucking) for grays.  I am not one of those people who freaks out about getting old (for now anyways) because I am loving this stage of my life; I have an amazing husband who understands me like no one else and two beautiful children that fill every day with so much joy, okay maybe not every day, but most of them 🙂

I just have to share one of my birthday presents with you.  My sweet mother made me a beautiful apron (I LOVE aprons!).  I was very excited when I pulled it out of the wrapping paper but it wasn’t until I got it on that I realized she stitched “Something Sweet Something Salty” accross the front pocket.  Instant tears!… I could not have thought of a more meaningful gift.  So, needless to say, I am going to be making one of my favorite recipes from my momma’s kitchen. This will forever be one of those meals that takes me back to being young.  It will always be one of the dinners that I request my mom to make when we visit because for some reason, it always tastes so much better when she makes it. The tender chunks of beef and full flavor of the gravy make it heavenly.  It fills the house with the most amazing smell. My mom always has to poke my hubby’s and my hands out of the pan because we keep stealing little bites before it is ready to serve.  You can serve this over white(or brown) rice or egg noodles.  Either one is fabulous.  This recipe originated from a good ol’ Betty Crocker cookbook and has been altered slightly over the years.

Ingredients:

2 lbs beef, cut into 1″ cubes (I usually use sirloin because it comes out really tender, but stew meat or whatever you have will work just fine, tougher cuts may just need to cook a little longer).

2 Tbsp shortening

2 cans condensed beef consume (I use Campbell’s soup brand)

1/3 cup red burgundy wine

1 Tbsp soy sauce

2-3 cloves minced garlic (depending on size of clove)

1/4 tsp onion salt

1 Tbsp cornstarch (or more if needed)

1/4 cup water

Noodles or Rice

Directions:

Cut meat into 1″ squares.  Melt shortening in a large skillet over medium-high heat, brown meat on all sides.  As always, be sure to preheat your pan before adding your meat so you sear in all of the juices instead of letting them seep out and boil your meat.  I would recommend breaking the meat up into two batches to brown it.  This way your pan stays nice and hot and reduces your chance of boiled meat.  If you do happen to get a lot of juice seeping out of the meat, soak it up with a paper towel and turn the heat up in your pan until it gets smokin hot again. 

Add beef consume, wine, garlic, onion salt, and soy sauce.  Heat to boiling.  Reduce heat; cover and simmer 2-3 hours or until meat is very tender.

In a separate small bowl, blend cold water and corn starch.  Stir gradually into meat mixture.  Cook, stirring constantly until mixture thickens and boils.  Boil and stir one minute.

Serve over rice/noodles. Pair with Garlic Green Beans (omit ham) and some Rosemary French Rolls.

Rosemary French Rolls

I have a big time weakness for bread.  Italian restaurants are a serious danger for me.  Now, mix bread with a pinch of rosemary and for some reason, I just can’t stop myself.  This recipe comes from one of my favorite cookbooks “Pillsbury Complete Book of Baking”  My little family of four put down a dozen of them tonight and we wanted more.  They are so soft and moist on the inside but a little crunchy on top…mmmm…mmm…mmm!

Ingredients:

2 to 2 and 1/2 cups all-purpose flour

1 tsp sugar

1 tsp salt

1 pkg. fast acting yeast (or 2 and 1/4 teaspoons)

1 cup water

1 egg white, beaten

dried rosemary leaves, crushed

Directions:


In a large bowl, combine 1 cup flour, sugar, salt and yeast: mix well.  In a small saucepan, heat water until very warm (120-130 degrees).  Add warm water to flour mixture.  Blend at low-speed until moistened; beat 2 minutes at medium speed.  By hand, sir in an additional 1/2 to 1 cup flour until dough pulls cleanly away from sides of bowl.

On floured surface, knead in 1/2 cup flour until dough is smooth and elastic, about 5 minutes.  Place dough in greased bowl; cover loosely with plastic wrap.  Let rise in warm place until light and doubled in size, about 30 minutes. A good way to check if your dough is doubled in size is to do the “poke test.”  Poke your finger into the top of the dough.  If the dent stays, your dough is ready, if it bounces back, you need to let it keep rising.

Grease large cookie sheet. Punch down dough several times to remove all air bubbles.  Divide dough into 12 pieces; shape into balls.  Place on greased cookie sheet.  Cover with greased plastic wrap.  let rise in warm place until doubled in size, about 15 minutes.

Place shallow pan half full of hot water on lower oven rack. (I suggest getting it to your stove top and adding water there instead of trying to walk a cookie tray with water from your sink, trust me – I had to mop up my floor 🙂 ) Also, when you open the oven door after placing the pan of water in, don’t put your face anywhere near the oven door.  I think I permanently melted my maskara onto my eyelashes.

Heat oven to 425 degrees.  Uncover dough.  Brush rolls with egg white; sprinkle with rosemary.  Bake at 425 degrees for 14-21 minutes or until light golden brown.  Immediately remove from cookie sheet; cool on wire rack.

Hearty Veggie Beef Soup

If I could only express to you how happy I am to be blogging right now… I just spent the last 3 days laid up in bed feeling oh SO sick.  I do not do the whole “lay around and do nothing” thing very well but thankfully I have a wonderful husband who insisted I rest and get better while he tended to the kids and house.  Needless to say, nothing but pizza, cereal and PBJ’s were coming out of my kitchen. It is the best feeling in the world to feel well again and get back to cooking, cleaning (which rarely appeals to me) and taking care of my family.  I am also thrilled to be able to post some new recipes.

A few years back, I had a whole slew of prime rib left over from our New Years dinner.  My family is not good at eating left overs unless I make them into a whole new creation, especially meat.  I created this recipe and fell in love with it.  This time, we had about 1 and 1/2 lbs of left over grilled sirloin steaks that I didn’t want to waste so I was thrilled to make this soup again.  You don’t have to use any fancy cuts of meat, it would be wonderful with ground beef or ground turkey as well. It is packed with lots of delicious veggies and tons of flavor.

Ingredients:

1 onion, chopped

6 cloves minced garlic

3 ribs celery

3 carrots, sliced

1/2 lb fresh (or frozen) green beans – don’t use canned, they will turn to mush.  Cut into 1 inch pieces.

2 small zucchini’s (I like to use one yellow and one green), quartered then sliced

1/2 cup fresh parsley, chopped

1 can garbanzo beans

1 can kidney beans

1 can diced tomatoes

1 can tomato sauce

1 can tomato paste

1-2 lbs meat (prime rib, sirloin, ground beef, ground turkey… your choice)

8 cups water

3 Tbsp beef base

1 tsp basil

1 Tbsp garlic powder

1 tsp ground pepper

1 tsp salt, to taste


Directions:

Prepare all of your veggies.  In a large pan, saute onion, garlic, celery and carrots in 1 Tbsp butter until onions are translucent.  Add to large pot.  Add grean beans, zucchini , parsley, beans, diced tomatoes, tomato sauce, tomato paste, meat, beef base, water, basil, garlic powder and ground pepper.

Bring soup to a boil then reduce to a simmer for 4-5 hours (or longer if you wish.) If you are using ground meat, you don’t need to cook it quite as long as all of your veggies are nice and tender.  Before you serve your soup, add your salt and taste.  Add more spice, salt or pepper if needed.  This could easily be cooked in a crock pot.  It also freezes very well.  Add cooked short macaroni noodles if you wish.

Pair with Rosemary French Rolls (coming soon).