Living Life Imperfectly

IMG_7625

Do you ever just have one of those days?  Today was a doozie for me and my family.  So, no recipes today – just some funny crazy stories about a day in the life of me.

I am incredibly thankful for the ability to laugh at my mistakes and failures and just life in general sometimes.  Yesterday,  I spent the day busting my buns making my house look…. moderately semi-clean.  There were still muddy puppy prints in the entry way, crumbs on the table and those pesky piles of clutter in the corners of the rooms that I just know I will be able to get to, some day.  I bathed dogs, taxied kids to and from our house to play with friends, made what seems like an unending supply of snacks and when the day was wrapping up, I decided to make a nice baked salmon and asparagus dinner with a beautiful Quinoa salad.  I hadn’t heard from my hubby yet as to his estimated time of arrival (since he had a crazy busy day of meetings and always has to deal with rush hour traffic) but went ahead thawing the salmon and preparing for a lovely dinner.  I placed my four beautiful bright pink salmon fillets on the sheet pan and surrounded them with crisp asparagus spears.

FullSizeRender

[Enter cute puppy]  At this point, our adorable 10 month old little Chug (Chihuahua Pug mix) puppy, Bentley, scratched at the door.  I walked away from dinner and let him outside.  He started barking as he darted off.  I growled in frustration and ran downstairs to the mudroom to fetch my shoes then went outside to wrangle the pup.  Of course, he decided it was a great time to play “Catch Me If You Can!” FINALLY I was victorious and carried the little runt inside.  As I turned the corner into my kitchen, my heart sunk.  Where there used to be 4 beautiful pink salmon fillets, now lay 3.  It was no mystery where the fourth one went [enter our bull-in-a-china-closet, eat everything in sight, adorable, loving, chocolate lab Drake (and of course his best buddy Bentley)].

IMG_4333

Immediately, I remembered a conversation I had long ago about raw salmon being possibly toxic to dogs and the search for the Hydrogen Peroxide commenced (a little shout out to the vet who once gave me the tip to give your dog peroxide to make them throw up if they have eaten anything possibly harmful – this little trick has saved us literally thousands upon thousands of dollars in vet bills for our sweet Drake.)

I closed him in the downstairs bathroom and gave him his first dose of peroxide, then went upstairs to try and salvage my motivation to continue with this dinner.  I made the delicious lemon, garlic, parmesan sauce and basted it on the salmon, seasoned the asparagus and popped it in the oven then went down to check on the salmon thief.  No progress.  More peroxide down the gullet and back upstairs to start the Quinoa.  I measured and rinsed it, then put my pan on the stove with some olive oil.

I hear my 10 year old yell “Mom, Drake puked.”  Back downstairs I went, loaded with paper towels, gloves and disinfectant.  I opened the door noticing that there really wasn’t much umm… salmon-ish substance there.  That’s when it hit me! He had ralphed right by the other bathroom door that leads out to our office.  There is a good size gap under that door so everything flowed under the door and into the office where our adorable previously mentioned 10 month old puppy was happily “helping me clean up the mess.”

Meanwhile, I can hear the timer going off on the salmon but seriously, am so frustrated at this point and am not wanting to even deal with food while I am dealing with this disaster. As I am juggling the puppy and cleaning the mess, giving him some peroxide and cleaning up his secondary mess, the smoke alarm goes off.  I ran upstairs to find that my pan that was heating the olive oil on the stove was now black on the bottom and sending plooms of smoke into our house.  I threw it in the sink, reset the smoke detectors, set the table and dinner was served.  My salmon dry like sawdust and my asparagus slimy and overcooked

My husband called to tell me that he had just left the office.  I advised him to stop off and grab a beer and some food elsewhere.  He happily obliged.  My sweet, loving boys ate every bite of their salmon and asparagus while we giggled about the happenings of the last hour.  I,  decided to cap off my meal with a big piece of chocolate cake my loving friend had gifted me earlier in the day. Happy ending, right? WAIT! That’s not allll!!!!

Fast forward to 4AM.  My youngest son Henry softly touches my shoulder and says “Mom, I just threw up.”  I said “I’m sorry honey.  Are you okay? Did you throw up in your bed?” He said, “No, in the hallway.  I tried to make it  to the bathroom.”

After cleaning him up and tucking him back in, back downstairs I went to the gloves, plastic bags, paper towels and disinfectant.  The poor boy was so close to getting to the solid surface flooring – just one more step would have gotten him off the carpet and into the bathroom but that was just not the way our day was working out. So… there I sat in the dimly lit hallway scrubbing away while my family slept.

Once I got it cleaned to my satisfaction, I tied up the bag and started for the stairs.  I took the first step then as my second foot contacted stair #2, the slow motion fall began.  I landed hard on my right hip then gracefully (of course) thudded down each and every step after.  My little sick boy, Henry, appears at the top of the stairs and says in his sweet, quiet little voice, “Mom, what just happened?”  “Ummm… Mommy just fell down the stairs buddy, but I’m gonna be okay, you can go back to bed.”  I chuckled as I limped to the garbage can to deposit the bag of yuck.

So, as I sit here today with my entire right “buttock” completely black and blue, a sore shoulder, elbow, back and neck, amidst a home that went from being moderately clean-ish yesterday to a complete disaster (somehow, haven’t quite figured out how) today, I just have to laugh.  I think if I didn’t laugh at myself, I would curl up in a ball and cry – because of course those are the only two options, right?

So cheers to all of you moms (and dads) out there who get the joy of living life imperfectly.


Stuffed Breakfast Croissants

IMG_4710

My husband has always been  my biggest fan, especially when it comes to food.  I will make him something and he will say “This is the best … I have ever eaten.” However, when I made these, he told me again and again that these were the best things he has ever put in his mouth.  Let me just tell you, these babies are a little (okay, a lot) time-consuming to make but they are complete masterpieces.  This is something that you will want to make when you want to blow someone’s socks off.  If you are not a huge fan of recipes that take a long time to make, I would suggest buying puff pastry dough in the freezer section and cutting your time WAY down.  I can tell you, they won’t be quite as amazing but they will be the next best thing.  I have always wanted to make puff pastry.  My very favorite thing in the world is chocolate stuffed puff pastry or croissants (we’re not talking Pillsbury canned croissants here folks, were talking tender, flaky, buttery heaven).  I have known that it is a multiple day process so I have put it off but finally feeling motivated, I set off to find the perfect recipe and oh my goodness, I found it. Drumroll please…..

http://www.sprinkledwithjules.com/home/2015/6/14/croissants-2

This is the most beautifully blogged recipe.  I took pictures of the whole process, but , honestly, there is no way that I could do what Jules has done here in her post.  She explains everything beautifully and has AMAZING pictures which I LOVE so why try to recreate something that is already amazing!

So, that being said, first go to her blog and make your dough then stop at step 8 and come back here and learn how to stuff them

Ingredients:

1 batch of puff pastry/croissant dough – find recipe at http://www.sprinkledwithjules.com/home/2015/6/14/croissants-2

10 eggs

breakfast meat/filling of your choice (ie. 10 pieces of bacon, 20 slices of ham, 1 lb sausage)

1 egg (for brushing tops)

1 Tbsp heavy cream

20 slices of your favorite cheese (I used Havarti)

Directions:


Okay, so let’s say you have gone through the lengthy (but oh so worth it) process and you have  your beautiful dough now. Let’s make the filling then we will take it out of the fridge and get started.

IMG_4675 - Copy - Copy - Copy

Beat one egg in a small dish.  Pour into a buttered, preheated pan.  Pick up your pan and circle it around to where the egg covers the bottom of the pan.  Let cook about 20-30 seconds or until the egg is firm.  Sprinkle with a little salt and pepper then flip over.  Cook for an additional 20-30 seconds.

IMG_4678 - Copy - Copy - Copy

IMG_4679 - Copy - Copy - Copy

Remove from heat and place one slice of bacon (or you can use any meat of your choice here, sausage, ham, prosciutto, or make it vegetarian and do spinach, mushrooms, whatever your heart desires). Top with your favorite cheese, ours is Havarti (super buttery and creamy).  You can even add a little bit of your favorite hotsauce (Tapatio, Cholula, etc.) then roll everything up inside the egg.

IMG_4682 - Copy - Copy

IMG_4683 - Copy

Each one of these little rolls will be cut in half.  So make one for every 2 croissants.  I did 10 breakfast croissants and 10 chocolate stuffed croissants (which I will be blogging next)

IMG_4693 - Copy

Okay NOW time to get that beautiful dough from the fridge.

IMG_4690 - Copy

Cut it in half and wrap the other half in plastic wrap and place in your fridge.  You will want to roll out the other half to about 8″x15″ and about 1/4″ thick.  Now cut it into 10 squares.

IMG_4695 - Copy

Roll each square out so it’s about 4″x8″.  Place half of one of your egg roll-ups inside and roll.

IMG_4697 - Copy

IMG_4698 - Copy

Now you will want to pinch the ends together and seal it up so that cheesy goodness stays inside.

Repeat this process until all of the dough is used.

IMG_4703 - Copy

Next step is to proof the croissants. You can do this 3 ways:  (1)let the rolled croissants proof slowly in the refrigerator overnight, (2) let croissants proof out on the counter in a cool place for 3 hours, (3) let croissants proof in a slightly warm place for 1 hour.  Letting them proof overnight in the fridge furthers the development of flavor, however at this point,  keeping it real… I just let them proof on my counter for 1 hour because I wanted to eat them so bad 🙂

If croissants proofed in the fridge, remove them and let them come to room temperature on the counter, about 2 hours. When dough is proofed, the croissants will be puffy, but not doubled in size. When the baking sheet is jiggled, the croissants will jiggle a little.

IMG_4702

IMG_4704

Next, whisk 1 egg and 1Tbsp of heavy cream in a small dish.  Now brush it on the tops of those beautiful rolls with a pastry brush, gently.
Place in a 400F degree oven for 30 minutes, rotating after 15 minutes, or until the tops are a deep golden brown.  My oven cooks a little hot so it didn’t take the full 30 minutes.  Watch them closely folks because after all of the time you have put in, the LAST thing we want to do at this point is burn these beauties. I can’t imagine the disappointment.  I think I would cry.

IMG_4707

Once they are baked to perfection, let them cool slightly so that they firm up.  Don’t serve these babies to someone you don’t like.  You worked way too hard to waste that effort (haha, just kidding… kind of).

Serve and sit back and listen to everyone rave as they close their eyes and savor every bite.  Not kidding folks.  They ARE that good.

Stay tuned for directions on stuffing them with chocolate which I highly recommend!

Stuffed Breakfast Croissants

  • Servings: 20
  • Difficulty: moderate
  • Print

Ingredients:

1 batch of puff pastry/croissant dough – find recipe at http://www.sprinkledwithjules.com/home/2015/6/14/croissants-2

10 eggs

breakfast meat/filling of your choice (ie. 10 pieces of bacon, 20 slices of ham, 1 lb sausage)

1 egg (for brushing tops)

1 Tbsp heavy cream

20 slices of your favorite cheese (I used Havarti)

Directions:

  1. Beat one egg in a small dish.  Pour into a buttered, preheated pan.  Pick up your pan and circle it around to where the egg covers the bottom of the pan.  Let cook about 20-30 seconds or until the egg is firm.  Sprinkle with a little salt and pepper then flip over.  Cook for an additional 20-30 seconds.
  2. Remove from heat and place one slice of bacon (or you can use any meat of your choice here, sausage, ham, prosciutto, or make it vegetarian and do spinach, mushrooms, whatever your heart desires). Top with your favorite cheese, ours is Havarti (super buttery and creamy).  You can even add a little bit of your favorite hotsauce (Tapatio, Cholula, etc.) then roll everything up inside the egg. Each one of these little rolls will be cut in half.  So make one for every 2 croissants.  I did 10 breakfast croissants and 10 chocolate stuffed croissants (which I will be blogging next)
  3. Okay NOW time to get that beautiful dough from the fridge.  Cut it in half and wrap the other half in plastic wrap and place in your fridge.  You will want to roll out the other half to about 8″x15″ and about 1/4″ thick.  Now cut it into 10 squares.
  4. Roll each square out so it’s about 4″x8″.  Place half of one of your egg roll-ups inside and roll.  Now you will want to pinch the ends together and seal it up so that cheesy goodness stays inside. Repeat this process until all of the dough is used.
  5. Next step is to proof the croissants. You can do this 3 ways:  (1)let the rolled croissants proof slowly in the refrigerator overnight, (2) let croissants proof out on the counter in a cool place for 3 hours, (3) let croissants proof in a slightly warm place for 1 hour.  Letting them proof overnight in the fridge furthers the development of flavor, however at this point,  keeping it real… I just let them proof on my counter for 1 hour because I wanted to eat them so bad 🙂
  6. If croissants proofed in the fridge, remove them and let them come to room temperature on the counter, about 2 hours. When dough is proofed, the croissants will be puffy, but not doubled in size. When the baking sheet is jiggled, the croissants will jiggle a little.
  7. Next, whisk 1 egg and 1Tbsp of heavy cream in a small dish.  Now brush it on the tops of those beautiful rolls with a pastry brush, gently.
  8. Place in a 400F degree oven for 30 minutes, rotating after 15 minutes, or until the tops are a deep golden brown.  My oven cooks a little hot so it didn’t take the full 30 minutes.  Watch them closely folks because after all of the time you have put in, the LAST thing we want to do at this point is burn these beauties. I can’t imagine the disappointment.  I think I would cry.
  9. Once they are baked to perfection, let them cool slightly so that they firm up.  Don’t serve these babies to someone you don’t like.  You worked way too hard to waste that effort (haha, just kidding… kind of). Serve and sit back and listen to everyone rave as they close their eyes and savor every bite.  Not kidding folks.  They ARE that good.


Savory Breakfast Cups

IMG_4806

I am sad to admit that I am not a planner.  I don’t usually have my meals planned a week in advance, I don’t keep a list of to-do’s on my bedside table.  I pretty much fly by the seat of my pants, starting a million tasks but finishing none because, well, that’s just how my mommy brain rolls.

Usually, when I wake up in the mornings, I stumble downstairs to the kitchen, make a coffee and a breakfast sandwich or some other quick breakfast for my hubby (occasionally, if I press snooze enough, this might entail ripping a banana from the bunch and serving it next to his coffee 🙂 ). Now, time to wake my little monsters (10 year old Wyatt and an 8 year old Henry).  There is usually a fair amount of scrambling to find this or that (i.e. searching for matching socks, because among the things I rock at as a mother, sock matching is definitely not one of them).  Couple all of this with some brotherly banter before the boys settle down with something that suites their simple tastes for breakfast that morning – usually a bowl full of mom-guilt (you know the kind, cold cereal, oatmeal packets, etc).

BUT, every once in a while, the stars align and I actually PLAN – pre-making our breakfasts BEFORE our week begins.  Such a novel idea.  SERIOUSLY!!! PURE BLISS! I am almost excited (I said almost) to wake up and pop something in the microwave for 30 seconds and have a delicious, protein filled breakfast for my family.

These breakfast cups are so delicious.  I created this recipe while my husband and I were on the Whole 30 diet. They tasted so naughty when we were accustomed to eating so healthy, but they aren’t, at all! They are packed with vitamins and protein. My husband always gets so excited when I make them and if I happen to make them on a day he is home from work, he will eat one or two for every meal.  He can not stay out of them.  I also made them for a catered brunch at our church for the community youth pastors and got RAVE reviews.   They are savory with a tiny touch of sweetness from the potatoes (which might seem a little odd, but its pretty fabulous).  I would highly suggest making a double batch of these if you have any big eaters in your family and are planning to have some leftovers for the week.


Ingredients:

3 medium-sized sweet potatoes (the kind with light brown skin and white flesh)

1 medium onion, diced

1/2 green bell pepper, diced

1/2 red bell pepper, diced

1 package prosciutto (If you are wanting to stay Whole 30 compliant, be sure to check your ingredients -we found ours at Costco and Trader Joe’s with just pork and salt).

8-12 eggs (one egg per cup – most packs come with 8-12 slices of prosciutto)

1/4 cup milk (omit for Whole 30/Paleo)

Salt

Black Pepper

Garlic Salt


Directions:


IMG_4775IMG_4776

Preheat oven to 350F degrees.  Peel sweet potatoes.  Using a food processor, shred potatoes.  If you don’t have a food processor, chop the potatoes into small pieces.  Heat 2 tbsp. your favorite cooking oil (I LOVE avocado oil) in a large heavy-bottomed pan on Medium-high heat.

IMG_4780IMG_4783

Do a sizzle test to make sure that the oil is hot enough.  Add potatoes, peppers, garlic onions and seasonings. Wait for several minutes before checking the bottom of the potatoes to see if they are golden brown.  Once they are crisp and brown, go ahead and turn them.  The potatoes will not take too long to cook thoroughly.  You don’t want them to get mushy.  Be sure to taste them at this point. Season them until you feel like they would taste great alone.  Continue to stir the potatoes every few minutes until they have a good brown color mixed throughout.

IMG_4787IMG_4788

Next you will want to pull the prosciutto apart.  It is pretty hard to separate without tearing but if it does tear, now worries.  Lay one piece of prosciutto in each cup of your cupcake pan (I could not live without my Demarle silicone cupcake pan.  NOTHING will stick to it.  If you are using a regular metal pan, be sure to use  non-stick cooking spray or cupcake liners or those babies will never come out.)

IMG_4792

Place your cooked hashbrowns inside the cups on top of the prosciutto.  Fill the cup but don’t pack it down.

IMG_4796IMG_4802

Beat an egg for each cup you are planning to fill.  Add about 1/4 cup of milk (again omit for Whoke 30/Paleo) and a little salt and pepper.  Whisk together.  Using a 1/3 cup measuring cup, fill each cup almost to the top with egg.  The egg will sink down under the hashbrowns so you may have to come back and top them off.

IMG_4803IMG_4804

Bake at 350F for 20 minutes.  Check to see if the centers of the egg cups are firm and not still runny .  If they are still runny, cook for 2 minutes at a time until they are firm (unless they are considerably runny, then add several minutes.)  Mine took 26 minutes total this last time but it will vary based on slight differences in oven temps and pan material so just keep your eye on it toward the end.

Let stand at room temperature for 5 minutes until they are cool enough to handle.  Remove from pan and serve warm.  I usually put the leftovers in a big gallon Ziploc and then reheat them in the microwave for a fast, delicious breakfast.


Savory Breakfast Cups (Whole 30 Friendly)

  • Servings: 8-12
  • Difficulty: Easy
  • Print

Ingredients:

3 medium-sized sweet potatoes (the kind with light brown skin and white flesh)

1 medium onion, diced

1/2 green bell pepper, diced

1/2 red bell pepper, diced

1 package prosciutto (If you are wanting to stay Whole 30 compliant, be sure to check your ingredients -we found ours at Costco and Trader Joe’s with just pork and salt).

8-12 eggs (one egg per cup – most packs come with 8-12 slices of prosciutto)

1/4 cup milk (omit for Whole 30/Paleo)

Salt

Black Pepper

Garlic Salt

Directions:

  1. Preheat oven to 350F.  Peel sweet potatoes.  Using a food processor, shred potatoes.  If you don’t have a food processor, chop the potatoes into small pieces.  Heat 2 tbsp. your favorite cooking oil (I LOVE avocado oil) in a large heavy-bottomed pan on Medium-high heat.
  2. Do a sizzle test to make sure that the oil is hot enough.  Add potatoes, peppers, garlic onions and seasonings. Wait for several minutes before checking the bottom of the potatoes to see if they are golden brown.  Once they are crisp and brown, go ahead and turn them.  The potatoes will not take too long to cook thoroughly.  You don’t want them to get mushy.  You will want to taste them at this point. Season them until you feel like they would taste great alone.  Continue to stir the potatoes every few minutes until they have a good brown color mixed throughout.
  3. Next you will want to pull the prosciutto apart.  It is pretty hard to separate without tearing but if it does tear, now worries.  Lay one piece of prosciutto in each cup of your cupcake pan (I could not live without my Demarle silicone cupcake pan.  NOTHING will stick to it.  If you are using a regular metal pan, be sure to use a good amount of non-stick cooking spray or cupcake liners or those babies will never come out.)
  4. Place your cooked hashbrowns inside the cups on top of the prosciutto.  Fill the cup but don’t pack it down.
  5. Beat an egg for each cup you are planning to fill.  Add about 1/4 cup of milk and a little salt and pepper.  Whisk together.  Using a 1/3 cup measuring cup, fill each cup almost to the top with egg.  The egg will sink down under the hashbrowns so you may have to come back and top them off.
  6. Bake at 350F for 20 minutes.  Check to see if the centers of the egg cups are firm and not still runny .  If they are still runny, cook for 2 minutes at a time until they are firm (unless they are considerably runny, then add several minutes.)  Mine took 26 minutes total this last time but it will vary based on slight differences in oven temps and pan material so just keep your eye on it toward the end.
  7. Let stand at room temperature for 5 minutes until they are cool enough to handle.  Remove from pan and serve warm.  I usually put the leftovers in a big gallon Ziploc and then reheat them in the microwave for a fast, delicious, hot breakfast.


Aebleskivers – Dutch Pancakes

nutella filledjelly filledHappy New Year!!!  I hope you have all had an amazing time celebrating with family and friends. We spent the countdown at home this year with our 2 boys.  This was the first year that they actually made it until midnight (or technichally the first year that we haven’t tricked them with the East Coast countdown.. heehee).  We had a fondu night complete with cheddar beer fondu, beef broth fondu (for steak) and my favorite, chocolate fondu with lots of fruit and donut holes for dipping.  It was such a fun night full of games, music and of course food.

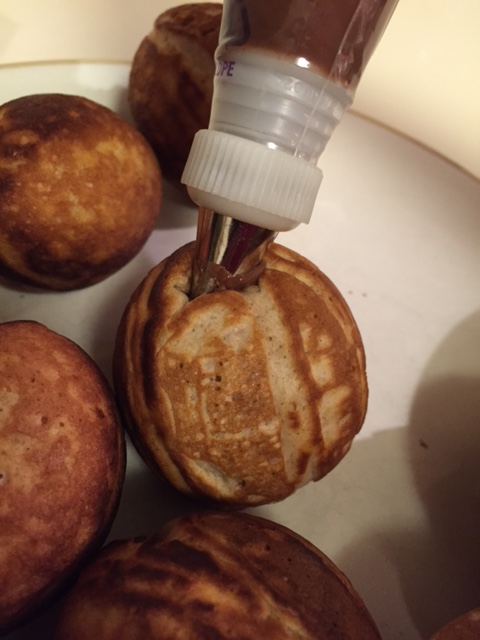
Breakfast consisted of bacon, eggs and these delicious gems called Aebleskivers [pronounced eb-el-skee-vers].  These Dutch pancakes do require a special pan if you want to make them round (you can technically just cook the batter flat on a skillet), but if you have the chance to pick one up, you are in for a treat! pan I purchased mine (actually my sweet momma bought it for me) from World Market.  I understand William Sonoma and Amazon also sell them.  These are to die for!  They are slightly crisp on the outside and dense yet fluffy on the inside.  Generally, they are served rolled in powdered sugar with some kind of fruit preserves (or Nutella).  You can also just serve with butter and syrup.  I like to pipe preserves or chocolate into the center of the pancake for a little extra wow factor.

Historically, Aebleskivers were made in hammered copper pans but today, the pans are generally made from cast iron or aluminum with a non-stick coating.  You will also want to have something to turn them with.

stick I used a little wooden stick I had for making caramel apples.  You can also use a chop stick, a fork or even a knitting needle if you really want to do it like  a pro.

These are such a fun treat! They are a blast to make and even more fun to eat.  There are several different recipes online, most call for either yeast or baking powder as the leavening agent.  I can’t wait to try the yeast ones but the baking soda ones apparently require a little less effort.

Ingredients:

2 1/2 cups all-purpose flour

6 Tablespoons sugar

5 1/2 tsp baking powder

1/2 tsp cinnamon

1/2 tsp salt

2 large eggs

2 cups milk

4 Tbsp melted butter

Directions:

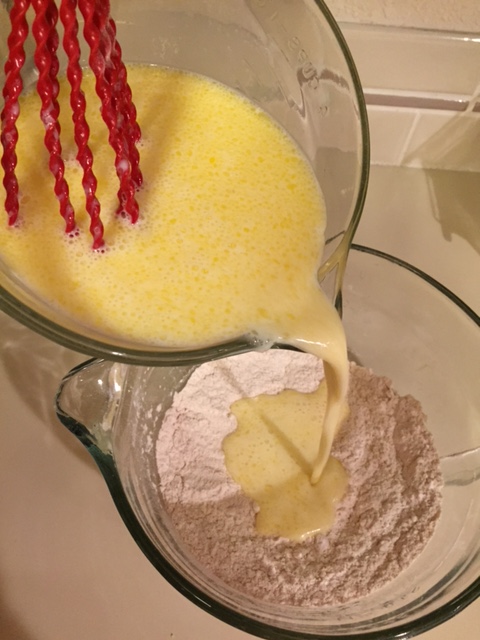
dry ingIn a mixing bowl, mix all the dry ingredients together (flour, sugar, baking powder, cinnamon, and salt).  wet into dry ingIn a separate bowl, whisk butter, milk and eggs together.  Add liquids to dry ingredients until evenly moistened.

butter panfill cups

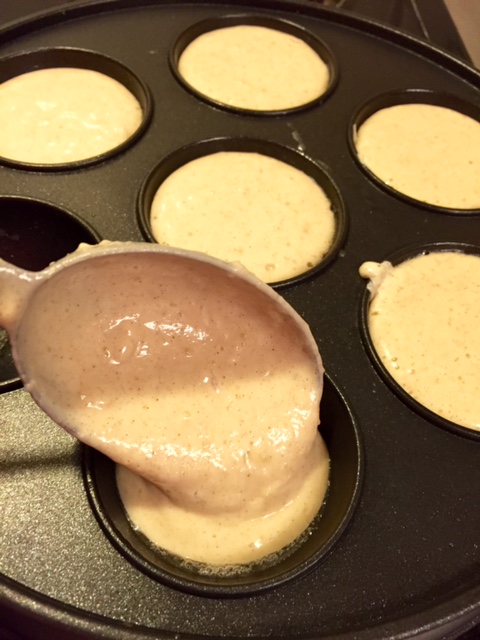
Place aebleskiver pan over medium-low heat.  When pan is hot enough to make a drop of water dance, brush pancake cups lightly with melted butter and fill each to slightly below the rim with batter.

first turn

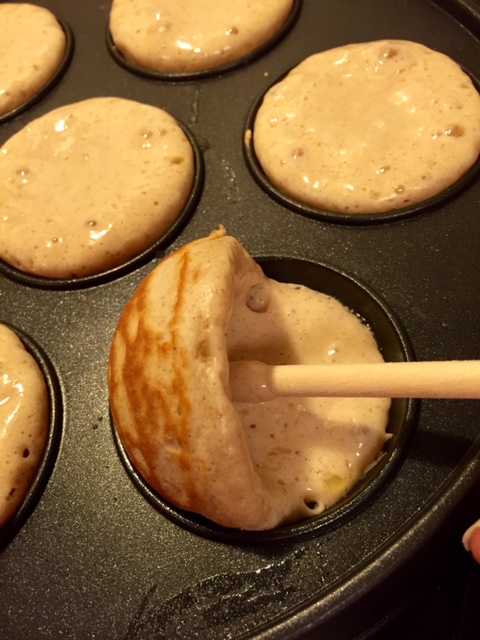
Cook for approximately 1 minute then poke your dowel (or whatever you are using) into the center of the batter and pierce the bottom.  Gently pull shell to rotate pancake until about half the cooked portion is above the cup rim and uncooked batter flows down into the cup.

turn all

ballsCook until crust on  bottom of ball is again firm enough to pierce then rotate ball with skewer until ball is closed.  Continue cooking, rotating the ball if needed until the batter in the center is completely cooked.  You will want to pull one of the pancakes apart slightly to test the center.

fill nutella

rolled in psAt this point, you can pipe filling into the center.  Roll in powdered sugar if desired.  Serve warm.

Aebelskivers

  • Servings: 6-8
  • Difficulty: moderate
  • Print

Ingredients:

2 1/2 cups all-purpose flour

6 Tablespoons sugar

5 1/2 tsp baking powder

1/2 tsp cinnamon

1/2 tsp salt

2 large eggs

2 cups milk

4 Tbsp melted butter

Directions:

  1. Mix all dry ingredients together in a bowl.
  2. Mix all wet ingredients together in a separate bowl.
  3. Pour wet ingredients into the dry ingredients and stir until completely combined.
  4. Heat pan on medium-low heat until hot enough to make a drop of water dance.
  5. Using a 1/8th measuring cup or ladle, fill each half sphere in your pan almost to the top.
  6. Let cook for approx. 1 minute or until a good crust forms on the bottom of the pancake
  7. Pierce your skewer into the bottom of the pancake and swipe it up, turning it 1/4 of a turn so that the batter once again fills the half-sphere.
  8. Let cook for at least another 30 seconds before turning again to complete the ball.
  9. At this point, you will just keep cooking and turning until the inside of the ball is completely cooked (you can test this by poking with a toothpick or splitting one slightly and peeking inside.
  10. Remove from pan.
  11. Pipe with filling if desired.
  12. Roll in powdered sugar.
  13. Serve warm.

I found this recipe here http://www.myrecipes.com/recipe/danish-pancake-balls-aebleskiver.


Baklava

IMG_4288

I am so exciting to be blogging right now!  For Christmas, my sweet husband bought me a laptop!  I have been dreaming for years about being able to blog from my couch or kitchen table or even my bed instead of in our chilly office where our family PC currently sits.  I knew exactly what recipe I wanted to bring you first because I have been so anxious to share this recipe with you!  Prior to making Baklava myself, I always assumed that it would be extremely difficult and time-consuming to make.  I was so wrong!  I have made this recipe 2 or 3 times now and anyone who tastes it raves about it and can’t believe that I actually made it myself. It is such a beautiful, delicate treat and it really is not difficult! The hard part is already done for you (the phyllo dough). You just have to slap it in a pan with some butter, nuts, and cinnamon, pour a homemade syrup over the top and voila’! – crispy, chewy, sweet, nutty homemade Baklava.  Let’s get started!

Ingredients:

1 (16oz) package phyllo dough (also spelled fillo, filo or phylo)

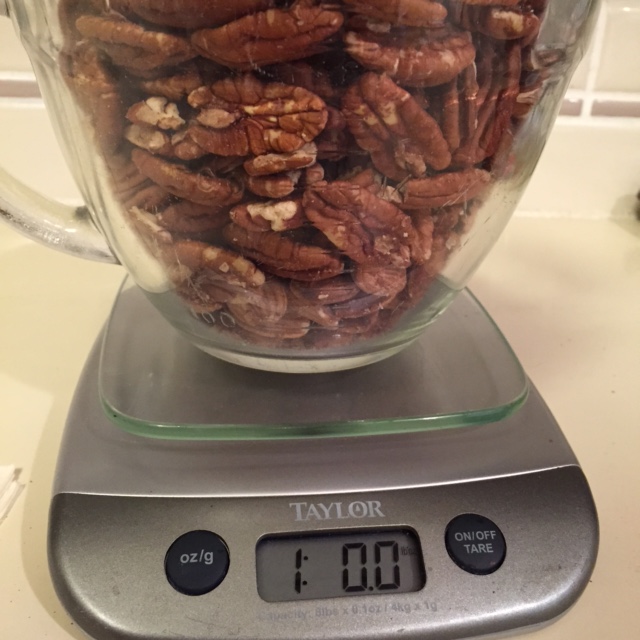
1 lb chopped nuts

1 cup butter

1 tsp cinnamon

1 cup granulated sugar

1 cup water

1/2 cup honey

1 tsp vanilla extract

Directions:

IMG_4254

First, you are going to want to visit your local grocery store freezer section and pick up some Phyllo (sometimes spelled Filo or Fillo) Dough.  It should be in a long rectangular box somewhere near the Cool Whip.  Defrost the dough according to the package directions (in the fridge or on the counter).  It shouldn’t  take too long to defrost.  A pastry brush will also be a necessity for this recipe.

IMG_4252 (1)

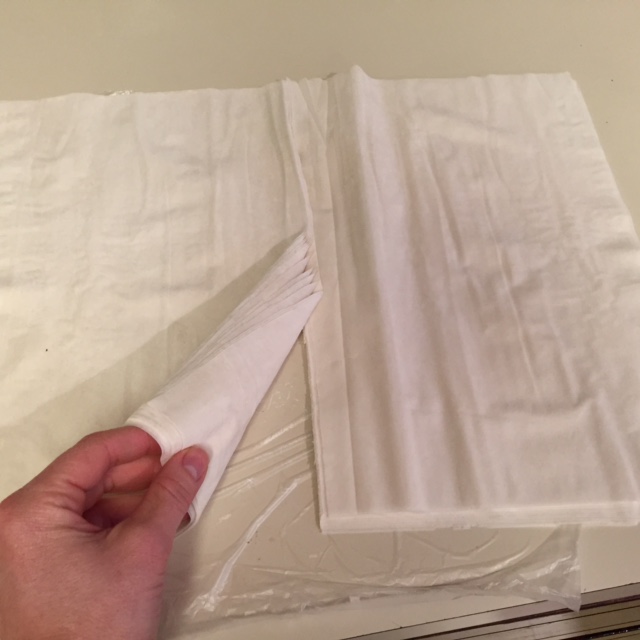
Preheat your oven to 350F degrees.  Once defrosted, open the box and unroll the dough onto your counter or onto a cutting board.  The dough will be approximately twice as wide as you will need it to be, so you will want to use a sharp knife and cut the length of the rectangle in half, leaving you with two piles of dough that will fit perfectly into your 9×13 pan.  Keep the dough covered with a damp cloth throughout the assembly process so it doesn’t dry out.

IMG_4255

Next melt butter in a bowl.  Make sure you are using real butter, not margarine.  Butter the bottom and sides of a 9×13 pan using your pastry brush.

IMG_4261

Place 2 sheets of phyllo dough down onto the buttered pan.  Butter the entire top sheet.  Place another 2 sheets of dough on top of the already buttered sheets.  Brush butter on top sheet.  Repeat this step until you have at least 8 sheets (4 layers of 2).

IMG_4253

IMG_4257

Now you will want to place a mixture of nuts (I used pecans and almonds. Some other good choices are pistachios or walnuts.  Just don’t use peanuts!) into a food processor (if you don’t have one, hand chopping will work, it will just require that you chop them very finely).

IMG_4259

Stir in cinnamon.

IMG_4262

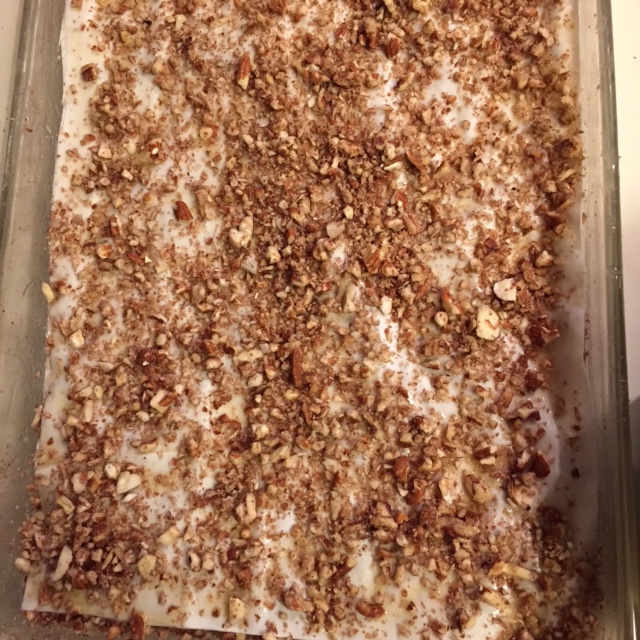
Sprinkle a light coating of nuts onto the top buttered layer of dough (approximately 1/4 cup)

Place another 2 sheets of dough over nuts and brush with butter.  Sprinkle with another layer of nuts. Repeat dough, butter, nuts for several more layers until you reach the desired thickness.  (Please keep in mind that you will need to save 6-8 sheets for the top layers that don’t contain nuts.  I also had approximately 8-10 sheets of dough left over that I cut in half again and used an 8×8 pan to make another small batch. Feel free to make it as thick as you want it).

Now layer 2 more sheets of dough then brush with butter 3-4 more times to make your top flaky layer.  Brush the top layer with butter.

IMG_4266

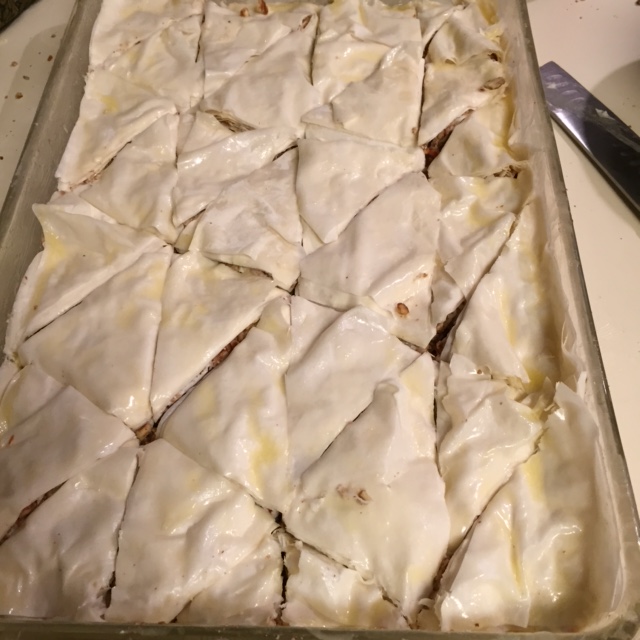
Using a sharp knife, cut all the way through the Baklava cutting it into triangles.  You can see I cut 4 long rows then cut diagonally and then diagonally again across to make smaller triangles.

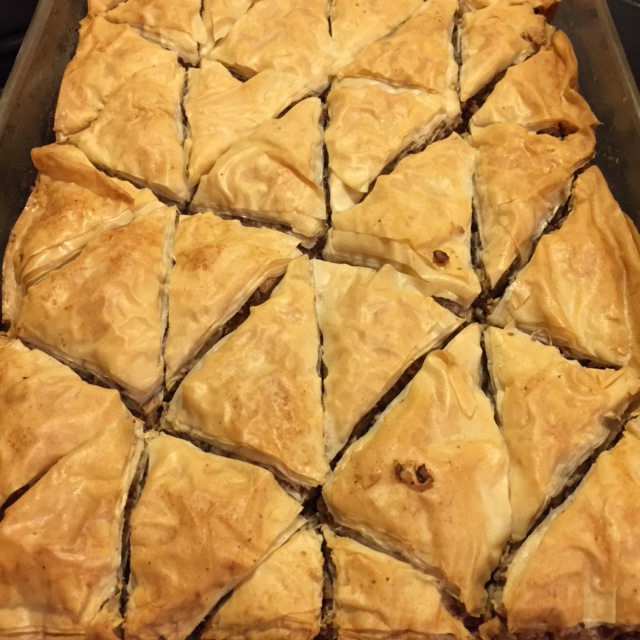
Bake at 350 degrees 50 minutes until Baklava is golden and crisp.

IMG_4272

While the Baklava is baking, make your sauce/syrup.  Boil water and sugar until dissolved then add honey.  Simmer for 20 minutes.  Remove from heat.  Add vanilla.

IMG_4271

IMG_4273

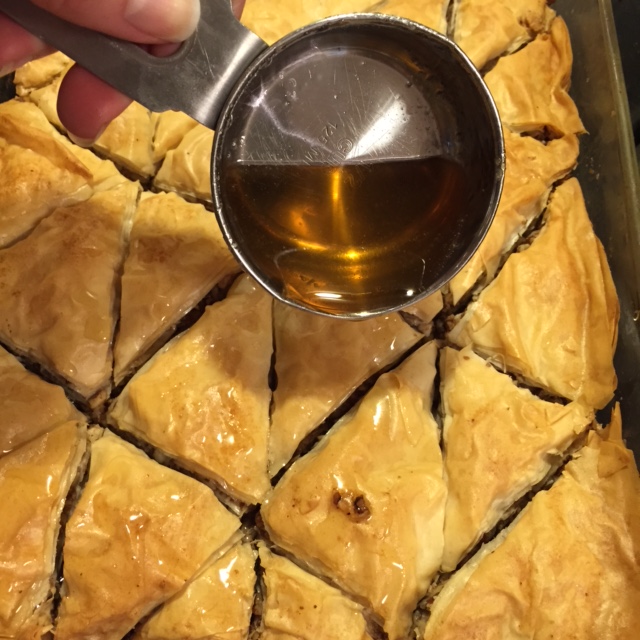
Remove Baklava from the oven and immediately pour syrup over the top.  If you let it cool completely before removing from the pan, it will really stick.  So, when it is still a little warm and pliable, remove each triangle and place in a cupcake liner or parchment paper square.

IMG_4281

These make really great teacher gifts, or party hors d’oeuvres – IF you decide after eating one that you even want to share them.

I found this gem of a recipe on allrecipes.com by NEONWILLIE.


Baklava

  • Servings: 28-30
  • Difficulty: Easy
  • Print

IMG_4281

Ingredients:

1 (16 oz) package Phyllo Dough

1 cup butter

1 lb chopped nuts

1 tsp cinnamon

1 cup granulated sugar

1/2 cup honey

1 tsp vanilla

Directions:

  1.  Preheat oven to 350 degrees.  Thaw phyllo dough.  Remove from box and unroll.  Cut in half so that sheets will fit in a 9×13 pan.  Cover with a damp cloth during preparation so it won’t dry out
  2. Melt Butter.  Using a pastry brush, butter bottom and sides of  9×13 pan.  Place two sheets of dough flat into buttered pan.  Brush top sheet thoroughly with butter.  Now layer another 2 sheets and again brush with butter.  Do this until you have 8 sheets layered in the pan.
  3. Chop nuts finely in a food processor (or by hand).  Stir in cinnamon.  Sprinkle a layer of nuts onto top sheet of phyllo dough (approx. 1/4 cup).  4.  Top with 2 more sheets of dough, butter then sprinkle with nuts.  Repeat these steps several more times until you reach the desired thickness.
  4. Top with 2 sheets of dough.  Butter top then repeat this (with no nuts) 3 times until you have 6 sheets (3 layers) of dough on top.
  5. Using a sharp knife, cut 4 long strips, then cut diagonally in both directions to make triangles.  Place in a 350 degree oven for 50 minutes or until golden brown.
  6. While Baklava is baking, make your sauce.  Boil 1 cup water with 1 cup sugar until dissolved.  Add honey.  Simmer for 20 min.  Add vanilla.
  7. When baklava is done baking, remove from oven and pour sauce over the top.  Let cool almost completely then remove pieces with a stiff metal spatula while still slightly warm.   Place each individual piece into a cupcake wrapper or parchment square. Do not cover. You don’t want any moisture to build because it will change the flaky texture.  Enjoy!


Drippin’ Delicious Chicken Tacos

IMG_3636

My husband and I recently completed 30 days of eating all whole, non-processed foods (on the Whole 30 plan).  I have never eaten so many vegetables, eggs and meat in my life, but surprisingly, we loved every single meal I made from the” Whole 30″ cookbook, the “Paleo Nom Nom” cookbook and the one that this recipe originated from “Against All Grain”.

I wanted to highlight one of my very favorite recipes that has now become a staple in our family – originally named “Crock Pot Chicken Tacos” in the cookbook, now named Drippin’ Delicious Chicken Tacos” by myself :).  I like to keep with the healthy theme and eat the tacos in a “lettuce tortilla” but my boys and husband now (post Whole 30) opt for the street taco feel with the little corn tortillas.  Either way, it will be one of those meals that you savor every single bite as the juice literally runs down your arm.

One of the reasons this recipe ranks at the top of my favorites list is because it is SO SO EASY! You literally throw the frozen chicken, salsa and spices in a crock-pot, turn it on, go about your day. BOOM! You have a meal.  I know we all appreciate being able to eat healthy and not have to slave in the kitchen all day.

The recipe calls for 1 lb of boneless, skinless chicken breasts as well as one pound of boneless, skinless thighs (which have become one of my favorite meats to cook with in the crock pot).  I had gotten a crazy deal on organic vacuum sealed BS thighs at one of our natural grocers so I bought about 20 lbs of it.  After using the first pack for stir fry one night, I was a little put off by the amount of fat that I had to cut through so the rest sat in my freezer for a couple of months until I tried this recipe.  Crock pot is the way to go for this inexpensive cut of meat! It just melts the fat away and makes really tender juicy chicken.  If you cannot find the thighs, feel free to just use all breast.


Ingredients:

1 lb boneless, skinless chicken thighs (these can be difficult to find so use all breasts if you need to)

1 lb boneless, skinless chicken breasts

1 14-oz container of fresh salsa (For Whole 30 purposes, check the ingredients to ensure there is no sugar or preservatives)

1 Tbsp cumin

1 Tbsp chili powder

2 1/2 tsp coriander

2 tsp sea salt (I absolutely love the Pure Himalayan Sea Salt – the pink stuff)

1/2 tsp cayenne pepper

1/2 tsp black pepper

*note – the original recipe called for 3 cups diced tomatoes in juices, 1 small yellow onion, diced, 4 garlic cloves, minced, 2 Serrano chilies, seeded and chopped and 2 Tbsp chopped cilantro but since almost all of these things are in a good fresh salsa, I just subbed the container of salsa with fantastic results*


Directions:

Place the frozen (or defrosted) chicken in the crock pot.  I did not trim any of the fat because most of it will melt away anyways, then I find it much easier to pull off the larger chunks while I am shredding it.

FullSizeRender (5)

Now dump a container of your favorite fresh salsa over the top of the chicken.

FullSizeRender (7)

I know, pretty difficult, huh?

Now, add all of your spices right on top. You still with me?

FullSizeRender (6)

So many spices!!! Soooo much flavor!

Okay, plug in your crock pot if you haven’t already (I only put this little reminder in here because mine sat out on the counter for about 45 minutes today before I realized it was unplugged – HA!) Crank that baby up to high heat and walk away.  About 2 hrs into the cooking process, I usually break up the chicken from the giant frozen clumps as it will be mostly defrosted by now. Is your mouth watering yet? FullSizeRender (8)

Let that baby sit for another 3-4 hours then shred. If you are using defrosted meat, obviously your cooking time will diminish significantly (I would lessen the cooking time by 1.5 hrs). If you are throwing this on before work, and plan to be gone for longer than 5 hours, place on low and cook for 8-9 hours.

FullSizeRender (13)

Once the chicken is tender enough to shred, pull out the thighs (if you are using them), and shred, removing any small bits of fat remaining.  Shred the breasts and place it all  back into the pot of juices.  Use tongs to squeeze the chicken out before placing in your lettuce boat or tortilla.  Top with avocado, salsa, cilantro.  If you are not interested in keeping it Whole 30, add some shredded cheese and sour cream.  Be sure to eat this over a plate as you will have a little pool of savory juices when you are through.  Makes great leftovers!  Also, try it on some greens as a salad. So good!

Drippin' Delicious Chicken Tacos

  • Servings: 6-8
  • Difficulty: Easy
  • Print

IMG_3636

Ingredients:

1 lb boneless, skinless chicken thighs

1 lb boneless, skinless chicken breasts

1 14-oz container of fresh salsa

1 Tbsp cumin

1 Tbsp chili powder

2 1/2 tsp coriander

2 tsp sea salt

1/2 tsp cayenne pepper

1/2 tsp black pepper

Directions:

  1. Place frozen chicken in the crockpot.
  2. Add salsa and spices.
  3. Cook on high for 1 hour then separate chicken breasts and thighs.  Cook for an additional 5-6 hours until chicken is tender enough to be shredded easily.  (You can also just place the chicken in the crockpot and cook on low for 8-9 hours if you are going to be gone).
  4. Remove chicken from crockpot and shred.  Remove any fat pieces from chicken thighs.  Add back to juices in crock pot.
  5. Squeeze chicken with tongs to drain some of the juice before placing it in lettuce leaves (for Whole 30/Paleo/GF) or tortillas.
  6. Top with avocado, salsa, and cilantro (and cheese and sour cream if your not trying to stay Whole 30 compliant).

Creamy Fall Vanilla Chai Mix

IMG_3627

Nothing says Fall like a cup of creamy spiced vanilla chai.  One of my very best friends got me hooked on this mix many years back and since then, none of the coffee shop chai even comes close.  This is so creamy and has the perfect amount of spice.

I have been working on getting my food processor’s license recently and all of my recipes have gotten shuffled from their usual spaces so I lost the original recipe.  I spent some time yesterday searching for one that looked close and found this one over at https://katskitchen.wordpress.com.  It is almost exactly as I remember the other recipe so I whipped up a batch and am once again in creamy chai heaven. This takes no time at all to whip up and it makes enough to share (if you want to part with it).  You can put it in little jars with a cute label and instructions.  It would make a wonderful Teacher’s gift or Secret Santa gift as well.

Ingredients

1 cup non-fat dry milk powder
1 cup powdered non-dairy creamer
1 cup French vanilla powdered non-dairy creamer
2 cups white sugar
1 ½ cups unsweetened instant tea (feel free to replace with instant coffee for a chai latte or Pero for a caffeine free version)
2 tsp ground ginger
2 tsp ground cinnamon
1 tsp ground cloves
1 tsp ground cardamom
1 tsp nutmeg
1 tsp allspice
¼ tsp white pepper

Directions

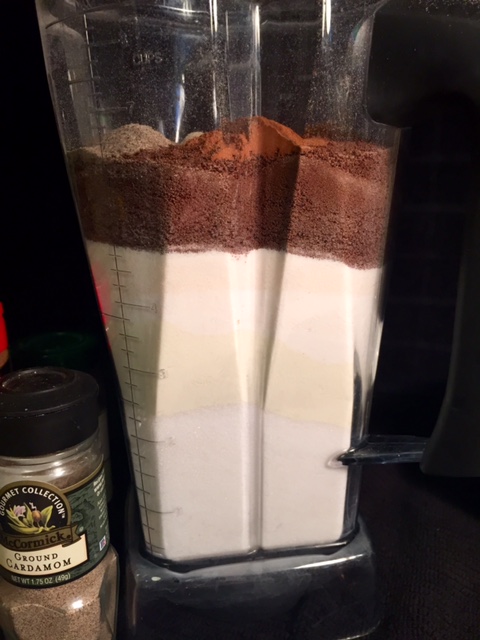
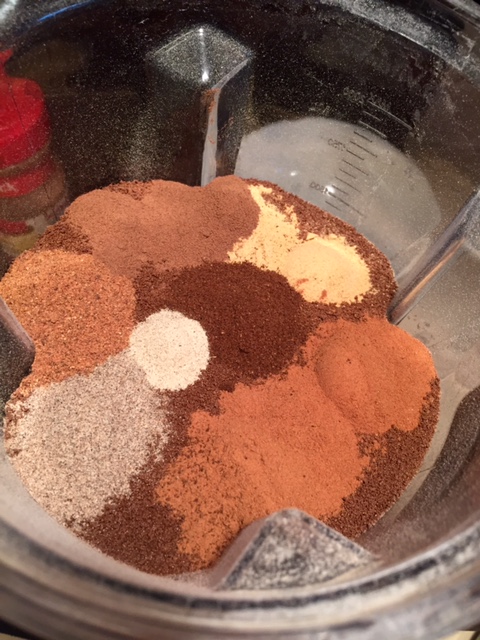
Place all ingredients in a mixer or food processor.  I suppose you could technically stir it all in by hand but the blender breaks the spices up really finely so you get the spice without the grit.

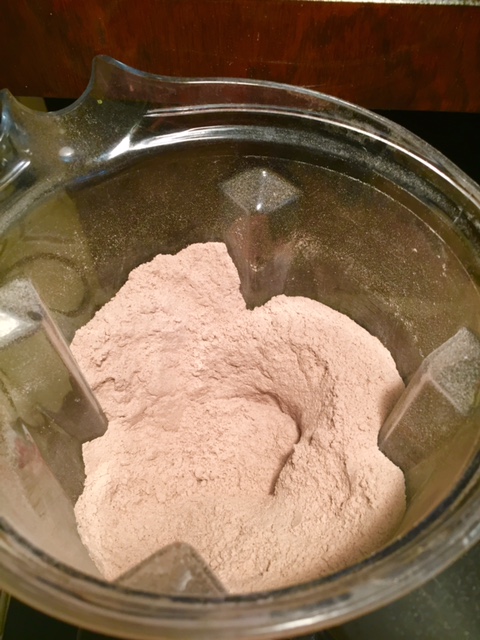
FullSizeRender (9) FullSizeRender (11) FullSizeRender (12)

Turn on your blender until the mix is all incorporated.

FullSizeRender (10)

Place in a jar or container that seals completely to keep moisture out.

Stir approximately 2-3 Tbsp of mix into 8 oz of steaming hot milk.  Shake a little dash of cinnamon on top.  Curl up on the couch with your favorite blanket and book/magazine,  lock the kids outside and take a moment to pause and enjoy the temporary bliss.

*If you want to serve the chai over ice, first mix a small amount of hot milk or water with the mix so it can dissolve, then fill the rest of the cup up with cold milk and ice.  Stir.

Delicious 5-Minute Ranch Dip/Dressing

ranch dip_Fotor

Confession… I am not a veggie lover, especially cooked veggies.  I have PTSD from my parents making me sit at the dinner table until all of my veggies were eaten.  I would gag several times while trying to swallow them and would eventually have to wash them down with milk.  As an adult, I have learned to eat them, but have never really enjoyed them much. That being said – I LOVE raw veggies dipped in Ranch! Not just any ranch… It has to be the ranch dip in the little packets mixed with sour cream.  I can eat raw broccoli all day long as long as it’s dipped in ranch.  Our youngest son unfortunately has not yet acquired a taste for veggies either, so I always have a baggie of fresh, cut up veggies in the fridge.  I make him take at least one bite of whatever vegetable we are having with dinner and if he doesn’t like it, he is allowed to grab a handful of raw veggies out of the fridge to eat them.  And he does.  He really likes them raw, dipped in ranch, just like me. And as long as he is getting the vitamins, I really am not too concerned with him gagging down the ones I have prepared for dinner.

So, after years of paying the “Hidden Valley” prices ($2-3/pack), I stumbled upon this recipe from http://www.thedailyblarg.com/2013/01/simple-homemade-ranch-dip-recipe.html  and now I make my own!  This recipe is even better than the little ranch packets and probably costs less than $.25 to make.  I always have all of these spices on hand, so, as long as I have some sour cream, I’m in business! I use the low-fat sour cream too so I can feel better about eating an entire tub of dip :).

Ingredients:

1 cup sour cream

1/2 cup mayo (I leave this out and add 1/2 cup extra sour cream and it is still wonderful, your choice)

1 tsp dried parsley

1/2 tsp dill weed (Some of you may not have this in your pantry.  Get some because you are going to be making this a lot! And it’s wonderful on fish too!!!)

1 tsp garlic powder

1 tsp onion powder

1/4 tsp ground pepper

1 tsp salt (I find that 1/2 tsp is plenty salty  so start off with 1/2 tsp and add more if needed)

Directions:

ingredients

If you have time to let the dip rest in the fridge for an hour or more, you can just combine all of the ingredients and you’re done.

Herbswet herbs

If you are wanting to have it right away, mix the dill, salt and parsley with two teaspoons of hot water.  This will allow the flavors of those herbs to bloom.

mix with sour creamdipping cucumber

Let stand for one minute and then mix with the rest of the spices and sour cream (and mayo of you prefer it).    That’s it! Way too easy, right? Enjoy with your favorite fresh veggies!

Creamy Chicken Alfredo

Chicken Fettuccini Alfredo

Your friends and family will be dazzled by this wonderfully creamy, garlicky, Alfredo with a hint of Parmesan.   I have several friends who request this meal every time they come to visit for dinner and it ranks up in my husband top 5 favorite meals.  Even the most amateur cook can perfect this dish with these few helpful hints.

Ingredients:

2-3 chicken breasts

1-2 tsp olive oil

Freshly ground black pepper

Kosher salt

1 box Fettuccine noodles – I know, don’t laugh at my picture… I forgot to get fettuccine at the store so spaghetti was the next best thing 🙂 You probably didn’t even notice until I voluntarily ratted myself out.

Alfredo Sauce:

2 Tbsp olive oil

2 Tbsp butter

1/4 cup all-purpose flour

4 cups milk or half and half (or a mixture of the two depending on how creamy you are wanting your Alfredo)

1/2 cup freshly grated Parmesan cheese

1/2 tsp garlic salt

1/2 tsp freshly ground pepper

salt to taste

Directions:

Heat large pot of water on high heat.

IMG_3758IMG_3766

Trim fat off of chicken breasts.  Rinse and pat dry with paper towels.  Butterfly breasts in half lengthwise. Season  with a small pinch of kosher salt on each side as well as some freshly ground  pepper.

IMG_3772

Heat olive oil over medium-high heat in a heavy bottomed pan.    When pan is good and hot, arrange chicken in pan.  Make sure you don’t add so much to the pan that it drastically cools down.  This will cook the juices right out of the chicken and you will be looking at rubbery boiled chicken. Once you see that the breast is cooked about half way through, flip the chicken, ensuring that there is a good golden crust on the bottom. Cook until the chicken feels firm in the thickest area of the breast (start by feeling the thinnest area of the breast.  You will feel how firm it is when it is cooked.  Make sure the thickest part feels that firm too).  Or if you aren’t comfortable with that, cook it to 160 degrees F.  Remove chicken from pan and cover.  Let rest for 5-10 minutes.  This allows all of the juices that rush to the center while cooking to redistribute throughout the chicken again. 

While meat is “resting, ” add noodles to water.  Be sure to stir every few minutes.

Roux - butter and oil Roux Add Flour Roux Add milk Parmesan Thickened sauce

Melt butter and olive oil together over medium-high heat.  Add flour to make a roux.  Once your roux starts turning a golden color, slowly add the milk/half-and-half, stirring constantly.  Continue to stir until the sauce is hot and is thickening.  Add Parmesan.  Stir and continue to heat until it reaches the desired thickness.  Add garlic salt and pepper.  Taste the sauce to determine the amount of salt you want to add.  I add at least a couple of pinches of salt but you might not prefer yours as salty.

Slice chicken and serve over pasta with your Alfredo.  Top with Parmesan if desired.

This sauce is also awesome as an appetizer for dipping. Serve with your favorite crusty french bread.

Coconut Macaroons – Heaven’s Cookie

Fotor0100215273

Seriously! If there are cookies served in Heaven (how could there not be, right?) – these will be them.  Not only do they come close to being the best thing I’ve ever eaten but they have no butter or oil and only use egg whites so besides a little sugar, they are probably one of the healthier cookies out there.  I only recently became acquainted with coconut macaroons on a summer trip to Denver.  I loved them so much and could not stay away from the little stash my sister-in-law had.  When I returned home, I immediately went on a search for the perfect coconut macaroon.  It only took one shot and I found it.  These are incredibly easy to make and will leave you oooing and awwing with every single bite.  They are slightly crispy on the bottoms and around the very outer layer and just seriously pure chewy heaven on the inside.   I now ensure that I buy coconut every single time I go to the store (in the bulk section)  because these have become a permanent fixture in my cookie jar.   There is one major problem with this recipe, it only makes 12-14 cookies.  Feel free to octuple it 🙂 Enough said.

Of course I always give credit where credit is due… However, my printer was out of ink when I discovered this wonderful recipe, so I had to hand-write it, and now I cannot find it online again for the life of me. I apologize to the macaroon genius who created this beautiful masterpiece.

Ingredients:

3 egg whites

1 cup sugar

1/4 tsp salt

1/2 tsp almond extract

2 1/2 cups sweetened coconut flakes

1/2 cup flour

Directions:

DSC_3422DSC_3424

In a double boiler, mix egg whites, sugar and salt.  If you do not own a double boiler like me, use a bowl that will fit into a small sauce pan without touching the bottom.  Add about 1/2 inch of water to the bottom of the pan.  The bowl should not touch the water.

DSC_3425 DSC_3426  DSC_3428 (800x533) DSC_3429 (800x533) DSC_3430 (800x533) DSC_3434 (800x533) DSC_3435 (800x533)

Cook over simmering water, stirring constantly until it is  thoroughly heated and sugar is dissolved.  Remove from heat.  Stir in almond extract.  Add coconut and flour.  Stir until incorporated.  Cover and refrigerate for 1 hour (or if you are like me and can not stop shoving the dough in your mouth and are afraid it won’t last an hour, just stick it in the freezer until it is cool (15-20 minutes), stirring occasionally.

DSC_3436 (800x533)DSC_3440 (800x533)

Heat oven to 325. Line cookie sheet with parchment paper.  I know this is an item that not everyone has in your kitchen.  Don’t substitute wax paper.  Wax paper is not meant for being heated so the wax will melt off and burn and smoke.  If you don’t have parchment and don’t see a trip to the grocery store in your near future, line your baking sheet with foil and grease the foil.  It may change the outcome of your cookie slightly but at least you won’t be scraping chunks of cookie stuck onto your baking sheet. Drop dough by 2 heaping Tablespoons or use your medium-sized cookie scoop for the perfect size and shape.  Bake for 20 minutes or until golden brown on the bottom.

Cool 5 minutes or at least long enough to not singe your tongue because 5 minutes will seem like an eternity.

Serve in a cardboard box shoved way to the back of your pantry where no one else can find it 😉 OR you could double the batch and at least let one other person in on your secret stash.